 |
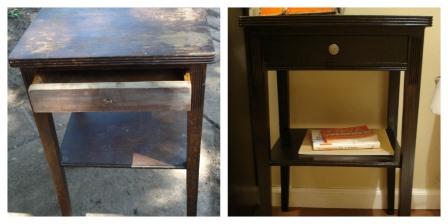
| the before and after |
Minwax Poly Shades Stain & Polyurethan 1 step (I bought mine at Home Depot)
2 sheets Sandpaper in a rough grit and a fine grit.
Cotton rags (I used old bath towels)
Good quality paint brush
First the table was sanded with a rough 80 grit sandpaper to remove the little finish that was on it. Second a finer grit 220 sandpaper was used to give a smooth, fine finish.
Once I was happy with the sanding, which on this little table took about 2 hours, I dusted and wiped it down to ensure no sandy grit was left on the table.
Next I used Minwax Poly Shades Stain & Polyurethane in 1 step to paint on a light even coat. The color in this project is Espresso Satin. Wait 6 hours before applying the second coat. The deep brown finish is perfect with only 2 coats and a second 6 hour drying time wait. I replaced the silver knob that came with it and moved it indoors. This was not a hard project and I would recommend any ammeture to go with it! Skill level on a 1-10 scale... about a 3.
Check out the rest of the bathroom remodel project. http://forwhatitsworth-jeannie.blogspot.com/p/one-year-project.html
