For what it's worth: June 2013

Amazon links may be included. Thank you for supporting this blog at no additional cost to you.

Saturday

Keeping kids entertained in the car:

Grand back seat "selfie".
It's summer here and we're in the car a lot traveling back and forth between my house, the family farm and the grands houses.  I love taking them with me which means they need to be busy in the car.  As the summer wears on, we're having to come up with new and different things to do along with some lessons learned "don't do" things.
This road side park is on hwy 287 in Texas

  • start a travel bag that stays in the car
  • pads of paper or spirals stay together better than loose pages, just saying
  • plan to stop at least every 2 hours for restless child and potty breaks
  • use old digital camera/ipod/cell phone with camera to play photo scavenge games (you can delete all the pictures of their feet and the back of your head later, that's the wonderful thing about digital) Check our "green scavenge" here.
  • print out maps and let them keep track of where you are (this keeps down that question "are we there yet?"
  • take advantage of those great road side parks 
  • take cups with lids and straws to minimize spills
  • take healthy snacks and limit the sugar (sugar usually creates excessive energy!)
  • color books and map colors (don't do crayons...they melt when left in the car)
  • draw and erase boards from the toy department
  • magnetic boards with game pieces, and paper doll characters (you can make these yourself)
  • cut out facial features from magazine ads for magnetic game board
  • music players with headphones
  • books on tape (I found several at a local resale shop)
  • if you have a recording device, let them record songs or stories they tell
  • finger knitting supplies (good directions for kids at this site)
  • keep a cooler with ice packs to store snacks (no melty chocolates!)
  • take a wild flower or plant identification book, press leaf or flower samples between the pages where they are identified
  • take an insect identification book too, for that digital camera scavenge
  • purchase or make sewing shapes such as leaves, flowers, whatever.  These are best made of cardboard with holes punched around the edge.  Use shoelaces or yarn with the ends taped to "sew" them together.
  • take clothes pins and make a yarn line from door to door or between the head rests in front of them to hang creations
  • purchase some window clings (they work on car windows for story telling)
  • remember to take a list of medications, doctor contact #, allergy list, safety kit (band aides!) baby wipes, sanitizer, paper towels, sunblock, insect repellent, hats, sunglasses, etc. (in my case, I also take a permission form from the parents to seek medical attention)

There are tons of things to do once you get started making a list or stroll down the toy isle at your local store.  Tell me your success stories.

Wednesday

Tuesday

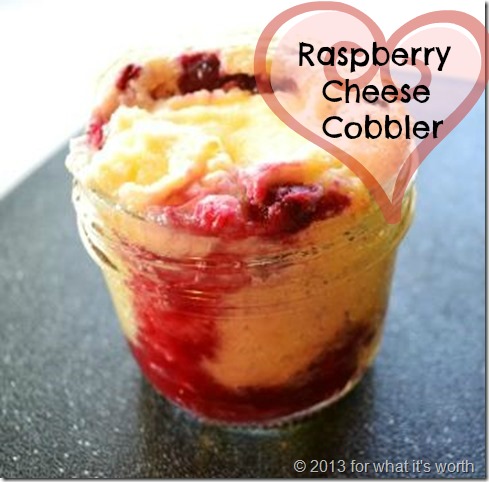
Mason Jar Raspberry Cheese Pie for Two


Fresh raspberry cheese cake pie in mason jars

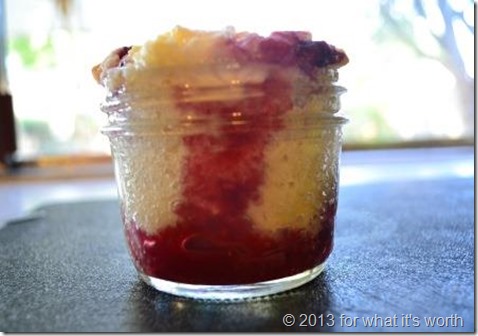
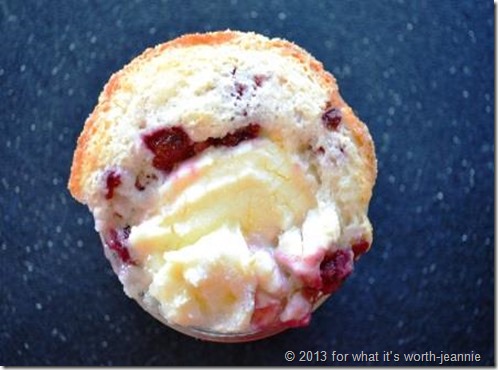
I was so pleased with the Strawberry Cobbler last week, that I decided to try using some frozen raspberries I had on hand and cutting the recipe to a serving for two.  It turned out great.
Fresh raspberry cheese cake pie in mason jars

Fresh raspberry cheese cake pie in mason jars

Raspberry Cheese Pie for Two:


Fresh Raspberry Cheesecake in a Jar

by ForWhatItsWorthJeannie
Keywords: raspberry cheesecake
Ingredients
  • +2 oven proof single serving containers (I used small Mason jars)
  • Melt 1 Tablespoon butter in each container. Roll the melted butter around the bottom and sides of the container.+
Stir together:
  • 1/2 cup self rising flour
  • 1/2 cup sugar
  • 1/2 cup 2% milk
  • 1-2 drops vanilla extract
  • +Put half of the batter in each of the containers. (1/2 to 1/3 full)
  • Add 1/4-1/2 cup raspberries on top of the batter.
  • Put a heaping tablespoon of cream cheese on top of the fruit.
  • Sprinkle a teaspoon of sugar on top of the cream cheese.
  • Place containers on a cookie sheet and place in center of oven at 350 F. Bake 25-30 minutes until light brown.+
Powered by Recipage

Monday

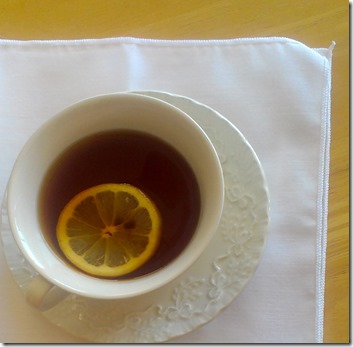
Tea Party with love.


tea
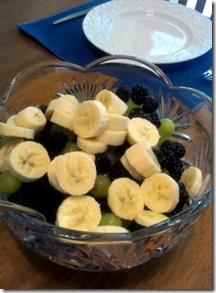
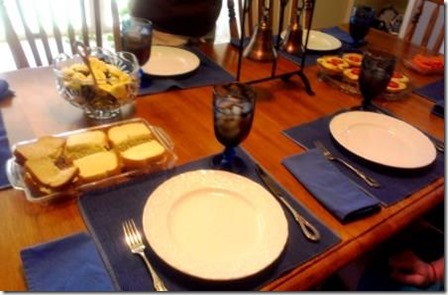
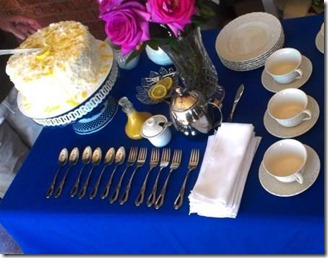
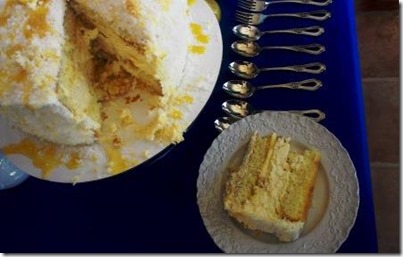
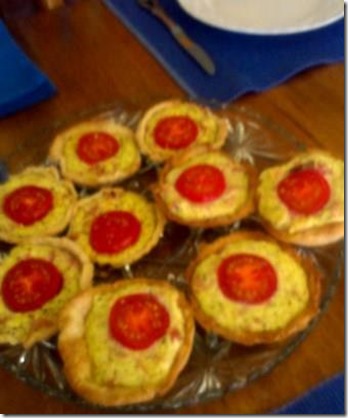
The big girl grand and I traveled to a tea party with an aunt last week.  It was wonderful.  My Aunt greeted us with big hugs and smiles then guided us to the dining room where she had prepared a lunch of Chicken Salad sandwiches, tomato tartlets (she shared her recipe with me and I’m sharing it with you at the bottom of this page),  fresh fruit salad, carrot sticks and ice tea.  We ate a leisurely lunch and talked a lot then moved to the sun room for dessert and hot Yorkshire tea and of course…more talking.   The Lemon Coconut Cheesecake was divine and perfect with the tea.  My cousin runs Windy Hill Farm Bakery out of Weatherford and made this cake.  It was really delicious! If you are anywhere near Weatherford of the DFW area, she does deliver!  Now, join us and feast your eyes on the photos.
Tomato Tart


IMAG1167
fresh banana, green grape, blackberries served with sweet dressing
IMAG1168   
IMAG1170 IMAG1172
IMAG1166

Tomato Tarts-


  • 1 8 oz ricotta
    2 lg eggs beaten
    2 oz diced ham
    3/4 c shredded parmesan
    1 tsp basil
    1 tsp oregano
    1/8 tsp salt (I heap mine)
    1/4 tsp black pepper
    Mix well.
    Sliced smaller size tomatoes
    Bake tart shells (I use my pie crust recipe) @ 450 for 8 min.
    Reduce heat to 350. Fill tart shells with mixture and press in small tomato slice in each. Bake for 20-25 min.

Saturday

"Oh, wow"

June, wheat harvest time in Texas.
The little grands and I stopped to watch
as this giant swathed its way through a field of wheat.
The two year old simply said, "oh, wow."

Things as I see them on Instagram

Thursday

PIN WIN Strawberry Cobbler


I was perusing Pinterest, as I often do, when I saw a recipe for strawberry cobbler at Menu Musings of a Modern American Mom: Strawberry Cream Cheese Cobbler.  I eat strawberries fresh, I eat strawberries on pancakes, I eat strawberries on short cake, but I have not eaten strawberries in a cobbler.  (sounds a little like Dr. Seuss, doesn't it?)  So I checked the fridge and all I needed was more strawberries.  A quick trip to the store and I had them.  They are luscious and red.  They will look pretty on the patriotic patio table I have set up and hubs loves to taste test for me.  Take a look at the jar lanterns hanging under the umbrella.  That is another Pin Win and you can see more HERE.  I cut the recipe down a little, since I cook for two and still had enough for 6 ramekins. Because the recipe is so simple, it will be very easy to cut it down even more.  I wish I had picked up some vanilla ice cream, maybe on the extras tomorrow...


Here is my decreased batter for 6 ramekins, but I really encourage you to check out the original site, she has gobs of other tempting recipes.


Wash, core, and remove stems off your strawberries.  I put 3 large strawberries in each serving.

Mix the batter:
  • 1 cup self rising flour
  • 1 cup sugar
  • 1 cup milk (I used 2%)
  • a few drops of vanilla
The rest of the cobbler ingredients:
  • 6 teaspoons butter
  • Strawberries (I had a pint)
  • 1/2 block of cream cheese
Melt a teaspoon of butter in the bottom of each ramekin (or a small canning jar)
Fill the ramekins about 1/3 full with batter.
Top the batter with 3 prepared large strawberries.
Top the strawberries with little dabs of cream cheese.  You don't need to cover them, just about a tablespoon to a ramekin.
Transfer the ramekins to a cookie sheet and place in the center of a preheated oven.
Bake 350 F for 45-55 minutes.  I left this batch in for an hour and it was a little over done.  I'm sure it's because I was cooking in ramekins and not a larger pan.  Duh, I knew better. 

What did I tell you...really simple!  Now, go put together some cobbler and then (while it's baking) go check out Julie's site.

Wednesday

PIN Win DIY Solar Lamps


I saw these great DIY istructions on creative cain cabin: DIY Solar Lamp using mason jars and solar yard lights.  Actually, I've seen them all over Pinterest, haven't you?  Any way, I happen to have one of those solar yard lights lying on the kitchen counter next to the back door and numerous jars under the counter.  After reading the article at Creative Cain Cabin and looking at the excellent DIY photos, I walked to the kitchen and assembled a mason jar lantern in seconds.  SECONDS!  I'm tempted to go out in the yard and pull up all the little yard lights and turn them into lanterns...

I waited till this morning and purchased more lights at the Dollar Store.  Added wire hangers and put them up.  Talk about a Pin Win, this one gets 5 stars for ease and craftiness.


Monday

Fairy catch

close up
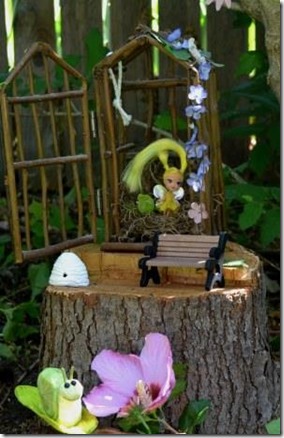
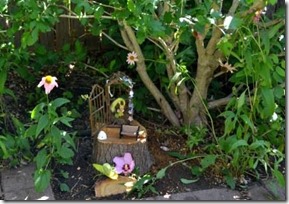
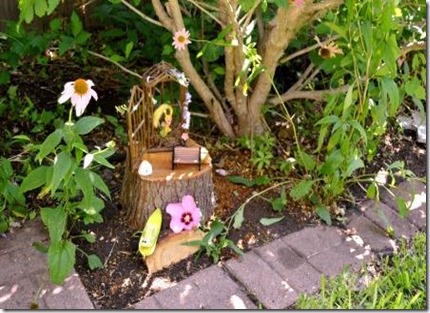
Hub took down the dead tree in the back yard last week and I asked him to leave the little stump for a fairy spot.  I found this cute little cage at a resale shop that I turned into a fairy catch.  The bench was purchased in the doll house furniture section at a craft store along with the paper Mache snail.  I used air dry clay to make a little bee keep.  Inside the catch is some sphagnum moss and….low and behold we’ve already caught a fairy!
                               DSC_1103     fairy      
DSC_1106
The little grands will love this.

Thursday

Cinnamon Roll Crust & Apple Pie recipes


I love Pinterest, I see so many wonderful ideas.  I also like adapting them for my cooking style.  I got the cinnamon/sugar recipe for crust off Pinterest and combined it with a ready made crust. It looks so pretty! I also saw this on Pintrosity because some users pinned and labeled the photo in a way readers thought they actually used cinnamon rolls.  Not so, cinnamon rolls will leave you with a really puffy and tiny pie cavity to fill.   That's one GOOD reason to click through a Pinterest posting and read the original post.  I used the pie in a jar idea to make my little individual pies. There is a good recipe on this site for the pies, but you can short cut it and use canned pie filling too.   I'm a little more on the "Semi Homemade" side when it comes to cooking.  The result was fantastic.  I can't wait for the next family event to take these.
Roll out pie crust, sprinkle with cinnamon & sugar
Roll dough with cinnamon & sugar inside.
Slice 1/2" slices
press inside jar, leave no spaces
Fill with pie recipe
Bake 350 F 50-60 min.

If you're against ready made pie crust and canned pie filling, here are recipes for the totally homemade version, which I can do, I just had a short cut kind of day when I made these and it never hurts to be prepared for a quick dessert when you're not in the cooking mood but you ARE in the eating mood!

Easy pastry recipe
for 2 crust pie
In a food processor; put

  • 2 1/4 Cups all purpose flour, 
  • 3/4 teaspoon salt, 
  • 2/3 Cup shortening (the firm kind-not oil or melted), Pulse until the mixture looks like pea size pellets.  
  • Drizzle in 8 Tablespoons COLD water. 

Pulse till the dough begins to ball up into a big ball.  If it is still crumbly and not sticking together into a ball add 2 more Tablespoons COLD water.  Divide the dough into 2 balls.  Wrap one in plastic wrap and put in the fridge while you work with the other half. Turn one ball of dough out onto a floured surface.  Flatten with your hands then use a floured rolling pin to roll out the dough.  For the cinnamon/sugar dough pictured above, sprinkle cinnamon and sugar over the flat piece of rolled dough.  Now, roll the dough with the sugar/cinnamon inside.  Cut into 1/2 slices.  Place the slices in your baking container and press flat-together leaving no spaces.

Apple pie:
Peal, core, dice

  • 4 tart apples (Cortland, Granny Smith, Jonathan)
Coat the apples with the dry ingredients by tossing them about with:
  • 1/2 Cup sugar
  • 1 1/2 Tablespoons all purpose flour
  • 1/3 teaspoon ground cinnamon
  • 1/8 teaspoon nutmeg

Place enough of the apple mixture in each pastry lined jar to come to the rim.  Top with a pat of butter (about a teaspoon slice). Cover with a circle of pastry (that you cut using the lid rim). Brush the top with milk,  Sprinkle some granulated sugar and  cinnamon on top and bake 350 F 40 minutes.


Wednesday

Felling a tree.

for what it's worth-jeannie
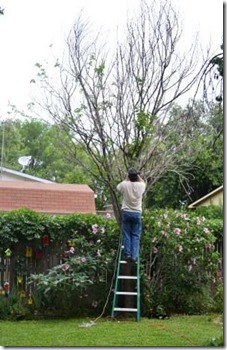
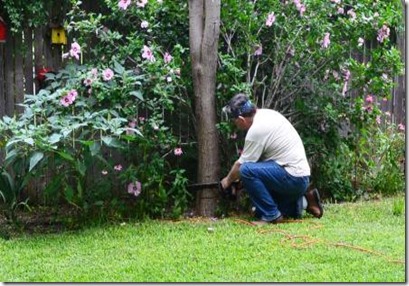
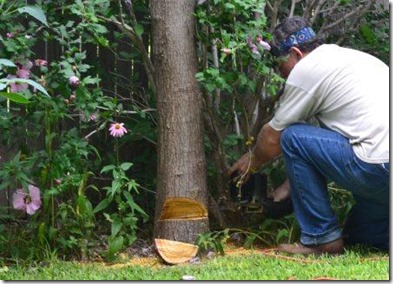
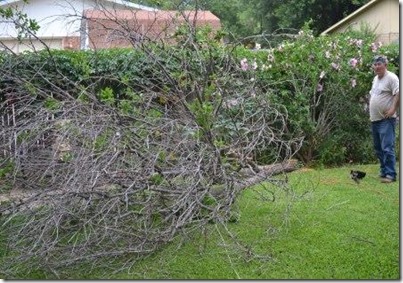
A couple of summers ago bag worms swept through our neighborhood killing a lot of trees.  It didn’t help Texas suffered extreme heat and has been in a long drought.  Though we tried spraying and saving this tree, it did not survive.  So down it had to come.  Fortunately it was not an overly large tree.  Hubs climbed a ladder and tied a guide rope to help bring it down away from the fence and most of the other garden plantings.  He then cut a V notch close to the base on the side facing the direction we wanted it to fall.  I held on to the rope while he made a straight cut behind the V cut and pulled tight when it began to fall…right where we wanted it.  It took several hours of snipping and sawing to get the tree into small bundles the city recycle truck will pick up and now the yard looks fantastic.  It actually will help the yard because we have two other trees in the small space that could use the shared nutrients and water.  It doesn’t take many words to get the picture…pun intended.  Wordless Wednesday.
           DSC_1078                    DSC_1080DSC_1082   DSC_1083DSC_1084  DSC_1085
Sharing at Wordless Wednesday

Tuesday

Look out, mamma's got spray paint!


My favorite craft supply is spray paint.  It's quick.  It's easy.  It works on everything.  That makes me happy.  I saw a cute post where Kathe with an E brightened up her privacy fence by painting some adornments to hang.  I finished reading the post, closed my computer and headed to the craft store where I bought 8 little birdhouses.  With my favorite craft supply...spray paint...I painted them and hung them in the Rosemary bush.  Then I looked at the fence where a number of larger bird houses were lost under the Virginia Creeper and the same weathered gray as the fence.  It took only a few seconds to  lift each house away from the fence and give the faces a colorful coat of spray paint. The entire project took less than an hour (which included the trip to buy the houses!) Thanks for the idea, Kathe with an E.


Monday

Brownie mix make over


I purchased one of those cheap brownie mixes at the grocery store.  You know, the 99 cent kind.  I decided it would be a quick cheap dessert fix for this afternoon.  I intended to bake them in my mini cupcake pan, but alas it is packed and in storage along with a lot of my kitchen clutter in preperation for the some day soon house on the market day.  Not to be undone, I just put the little liners in a pie pan and filled them 2/3 full with brownie batter.  I chose the shorter cooking time listed on the box, removed them from the oven and while they were still hot added a teaspoon of peanut butter and a few mini chocolate chips.  The heat melted it all together and made a cheap mix into a decadent dessert.  I love taking the easy way out sometimes, don't you?


MMM.  They are so yummy.
Check out my favorite party link up spots here.